좀비
/zombies
좀비
부활대에서 시체로 되살린 좀비는 묘지기의 시설에서 일하고, 다른 좀비에게 재료를 공급하며, 공장에서 일하고, 교회에서 노래하고, 전투에 나선다.
시스템





좀비 부활
부활 장치를 사용하면 부활대가 시체를 좀비로 바꾸며, 부활 실험실에는 질투의 날에 그에 필요한 전력이 들어온다. 폭풍우의 기도문 설교에 성공하면 폭풍의 신 효과를 얻으며, 효과가 지속되는 동안 어느 요일에나 부활시킬 수 있다.
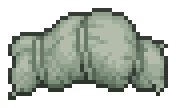



- Red skulls
- Each red skull on the corpse opens one perk slot on the zombie.
- Name
- The Resurrection window gives the zombie one of 40 names, and Roll Name draws another.
- Missing organs
- The table refuses the corpse: "This body is missing vital organs. You can't make zombies without them."
- Weak collar
- The table refuses the collar: "This Zombie Collar isn't good enough for this corpse. You need a higher-quality collar."
- New collar
- A zombie's collar can be replaced later by one with a higher red skull limit.
- Zombie count
- Each resurrection adds one zombie to the count that the zombie limit caps.


좀비는 묘지기와 같은 다섯 가지 숙달을 가진다. 레시피에 적용되는 좀비의 숙달은 해당 숙달 트리에서 산 것에 손에 든 도구의 보너스와 그 작업에 대한 좀비 특성을 더한 값이다. 도구나 무기 하나와 갑옷 하나를 장착한다.


- Rusty Axe+1 Building - worth 10 bronze
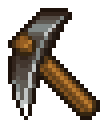
- Rusty Pickaxe+1 Building - worth 10 bronze
- Bronze Axe+2 Building - worth 1 silver 50 bronze
- Bronze Pickaxe+2 Building - worth 1 silver 50 bronze
- Iron Axe+4 Building - worth 10 silver
- Iron Pickaxe+4 Building - worth 10 silver
- Steel Axe+6 Building - worth 1 gold 20 silver
- Steel Pickaxe+6 Building - worth 1 gold 20 silver







- Rusty Hammer+1 Smithing - worth 10 bronze
- Bronze tools+1 Smithing - worth 1 silver 50 bronze
- Bronze Hammer+2 Smithing - worth 1 silver 75 bronze
- Iron tools+2 Smithing - worth 20 silver
- Iron Hammer+4 Smithing - worth 15 silver
- Steel tools+4 Smithing - worth 2 gold 50 silver
- Steel Hammer+6 Smithing - worth 1 gold 20 silver







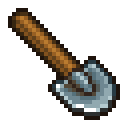
- Rusty Shovel+1 Farming - worth 10 bronze
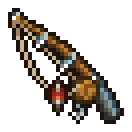
- Basic Rod+1 Farming - worth 20 bronze
- Bronze Shovel+2 Farming - worth 1 silver 60 bronze
- Amateur Rod+2 Farming - worth 1 silver
- Iron Shovel+4 Farming - worth 17 silver 50 bronze
- Advanced Rod+4 Farming - worth 5 silver
- Steel Shovel+6 Farming - worth 1 gold 45 silver
- Pro Rod+6 Farming - worth 1 gold





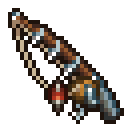












좀비의 붉은 두개골 하나마다 슬롯이 하나 열리며, 트리에서 사는 노드는 특성이든 숙달이든 하나당 슬롯 하나를 차지한다. 제작하며 얻은 기술 포인트로 노드를 산다.
 공장 직공좀비의 비용: 붉은 기술 포인트 500
 까치의 눈좀비의 비용: 붉은 기술 포인트 500
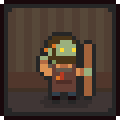 견습 목수좀비의 비용: 붉은 기술 포인트 200
 달인 목수좀비의 비용: 붉은 기술 포인트 500
 초보 석공좀비의 비용: 붉은 기술 포인트 200
 달인 석공좀비의 비용: 붉은 기술 포인트 500
 양복점좀비의 비용: 붉은 기술 포인트 100
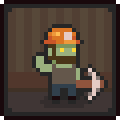 채석공좀비의 비용: 붉은 기술 포인트 200
 벌목꾼좀비의 비용: 붉은 기술 포인트 200
 굴삭기좀비의 비용: 붉은 기술 포인트 50
 좀비 광부좀비의 비용: 붉은 기술 포인트 100
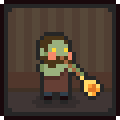 유리 공예의 대가좀비의 비용: 붉은 기술 포인트 200
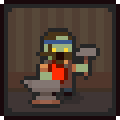 초보 대장장이좀비의 비용: 붉은 기술 포인트 100
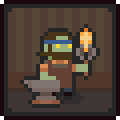 숙련 대장장이좀비의 비용: 붉은 기술 포인트 200
 달인 대장장이좀비의 비용: 붉은 기술 포인트 500
 가시공좀비의 비용: 붉은 기술 포인트 200
 장님 명사수좀비의 비용: 붉은 기술 포인트 200
 통조림 깡통좀비의 비용: 붉은 기술 포인트 400
 언데드 회복성좀비의 비용: 붉은 기술 포인트 400
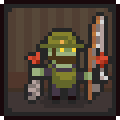 초보 낚시꾼좀비의 비용: 녹색 기술 포인트 200
좀비를 시설로 옮겨 배치하면 시설에 따라 작업이 정해진다.
좀비는 작업대와 용광로에 대기열로 올린 아이템을 제작하며, 자신의 숙달에 맞는 레시피만 따른다. 도구로 작업하는 시설에서는 좀비가 그 도구를 손에 들고 있어야 한다.
- SawhorseBuilding, no tool needed
- Circular SawBuilding, no tool needed
- Chopping SpotBuilding, needs an axe
- Woodworking Workbench IBuilding, no tool needed
- Woodworking Workbench IIBuilding, no tool needed
- Stonemason's WorkbenchBuilding, no tool needed
- Potter's WheelBuilding, no tool needed
- KilnBuilding, no tool needed
- Spinning WheelFarming, no tool needed
- Weaving LoomFarming, no tool needed
- Sewing TableBuilding, no tool needed
- Sluice BoxSmithing, no tool needed
- Furnace ISmithing, no tool needed
- Furnace IISmithing, no tool needed
- Wooden AnvilSmithing, needs a hammer
- Iron AnvilSmithing, needs a hammer
- Steel AnvilSmithing, needs a hammer
- MillstoneFarming, no tool needed
- Kitchen TableFarming, no tool needed
- Kitchen Table IIFarming, no tool needed
- Kitchen OvenFarming, no tool needed
- Kitchen Oven IIFarming, no tool needed
- Brewing StandFarming, no tool needed
- Vine PressFarming, no tool needed
- Fermentation BarrelFarming, no tool needed
- Wine BarrelFarming, no tool needed
- Formulation BenchAnatomy, no tool needed
- Writing DeskBook writing, no tool needed
- Paper PressBook writing, no tool needed
- Printing PressBook writing, no tool needed
- Jewelry TableSmithing, no tool needed
- Distillation CubeAnatomy, no tool needed































다음 시설은 재료가 필요 없으며, 배치된 좀비가 계속 생산한다.
- Zombie Stone QuarryMakes 1 Stone, needs a pickaxe
- Zombie Marble QuarryMakes 1 Marble, needs a pickaxe
- Lumberjack standMakes 1 Log and 2 Stick, needs an axe
- Zombie MinerMakes 1 Iron Ore and 2 Coal (10% chance of a Gem with Magpie’s Eye), needs a pickaxe
- Clay Digger StandMakes 1 Clay, needs a shovel
- Sand Digger StandMakes 1 Sand, needs a shovel
- Gardener StandPlants seeds in and harvests the garden beds of the Garden or Vineyard, needs a shovel







좀비 공급원은 작업 시설 좀비에게 필요한 아이템을 배달하고, 자동 제작을 위해 작업대에 아이템을 넣는다. 구역 내 좀비 공급소에 좀비를 배치하면 그 구역 시설의 좀비가 알아서 일한다.
- Zombie Supplier StationIts zombie supplies the workstation zombies of its area
- Porter StationIts zombie carries Stone, Marble, Log, Coal, Iron Ore, Clay, Sand, Beer and Wine to the Factory and Honey, Hops and Grapes to the Vineyard Basement
- Zombie Supply PorterIts zombie carries items off the conveyor line to the Supply Storage, one at a time



공장 작업 시설은 좀비가 있어야 작동하며 컨베이어 벨트로 연결해야 한다. 공장 전력이 공장의 수용량을 제한하며, 좀비 컨베이어 벨트마다 전력이 늘어난다.
- Assembly bench IBuilding, works the conveyor line
- Assembly bench IIBuilding, works the conveyor line
- Assembly bench IIIBuilding, works the conveyor line
- Smithy ISmithing, works the conveyor line
- Smithy IISmithing, works the conveyor line
- Kitchen IFarming, works the conveyor line
- Kitchen IIFarming, works the conveyor line
- Assembly benchBuilding, works the conveyor line
- Zombie CarouselTakes zombies. 7 factory power, 10 with Belt Master








- ChoirHolds 5 zombies. 1 church quality, and each zombie adds 1 (2 with Novice Musician, 4 with Skilled Musician or 7 with Maestro)
- OrganHolds 1 zombie. 5 church quality, and its zombie adds 1 (2 with Novice Musician, 4 with Skilled Musician or 7 with Maestro)
- Novice MusicianZombie perk: 2 church quality from its zombie in the Choir or Organ
- Skilled MusicianZombie perk: 4 church quality from its zombie in the Choir or Organ
- MaestroZombie perk: 7 church quality from its zombie in the Choir or Organ





막사의 전투 숫양이 분대 슬롯을 잠금 해제하며, 분대는 그곳 슬롯에 넣은 좀비로 편성된다. 좀비는 갑옷을 입고 창이나 활을 들어야만 싸우며, 장비가 좋을수록 방어력이 높다.


좀비 한도는 부활 실험실 품질과 같다. 묘지기의 좀비가 한도보다 많으면 좀비 과다 효과가 적용된다: “좀비를 너무 많이 보유하고 있어서 사람들이 소름 끼쳐합니다. 설교의 효과가 감소합니다.” 기도 등급 58개 중 32개의 보상이 줄어든다. PR 장치로 한도를 올릴 수 있으며, 재료는 식탐의 날에만 넣을 수 있다.





PR 장치를 업그레이드하면 더 긴 프로그램이 잠금 해제된다.
| Upgrade | Materials |
|---|---|
| Upgrade PR Machine I | 10 Oiled Plank and 8 Iron Detail |
| Upgrade PR Machine II | 6 Wooden beam and 8 Advanced Detail |
| Upgrade PR Machine III | 6 Wooden Joint and 8 Steel Detail |
| Upgrade PR Machine IV | 10 Carved Wood and 8 Engineering Details |
좀비 관련 질문
좀비가 일하려면 무엇이 필요한가요?
레시피 요구치 이상의 숙달, 손에 든 해당 시설용 도구, 그리고 재료: 좀비를 배치한 좀비 공급소에서 그 구역 작업 시설의 좀비에게 재료를 공급한다. 공장에서는 시설을 컨베이어 벨트로 연결하는 것도 필요하다.
좀비 수를 제한하는 것은?
좀비 한도(부활 실험실 품질). 한도를 넘으면 좀비 과다 효과로 기도 등급 58개 중 32개의 보상이 줄어든다. 식탐의 날에 PR 장치에 재료를 넣으면 1~5주 동안 한도가 오른다.
시체의 두개골은 좀비에게 어떤 영향을 주나요?
시체의 붉은 두개골 하나마다 좀비의 특성 슬롯이 하나 열리며, 부활대의 칼라는 적어도 그만큼의 붉은 두개골을 허용해야 한다.
개인 좀비 구역의 요구 조건은?
앨버트의 요구: 붉은 두개골이 8개인 좀비를 그의 실험실 특별한 자리에 둘 것. 이를 위해 퀘스트에서 받는 아이템: 황금 좀비 칼라 ×2, 소생의 액체 ×2. 청동 좀비 칼라의 한도는 붉은 두개골 5개다. 그러면 그 좀비는 더 이상 좀비 한도에 포함되지 않는다.
관련 페이지
- The six-day weekGluttony to Wrath: the event tied to each day and the quest that unlocks each day's wheel picture.
- Graveyard qualityHow skulls and wreaths score a grave, every headstone and decoration, and what the score pays.
- Energy and insanityWhat costs energy, what causes insanity, and every food and drink with its values.
- Money and tradingBronze, silver and gold, trader purses, town orders on Pride, Likes caps and the sources of income.
- Tech pointsRed, green and blue points: what the tree costs and where each colour comes from.
- FAQShort answers with exact numbers: days, recipes, saving, zombies and fast travel.
- Pre-order bonusWhere the Sauna and the platform outfit are, and what they do.