Corpses and autopsy
White skulls for the graveyard, red skulls for zombies: what every body part carries, and the Anatomy each extraction needs.
The Keeper's work
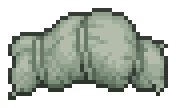
Every corpse is made of six body parts - skin, bones, skull, heart, brain and guts - plus 1 to 4 soft parts (Fat, Blood and Flesh) in its pockets. The corpse's white and red skulls are the sum of its parts, and removing or adding organs at the autopsy table changes them.
A buried corpse's white skulls count toward the grave's quality, but its red skulls never do - and each red skull has to be covered by a wreath before the white ones start to count. A resurrected zombie is the opposite: every red skull unlocks a zombie perk slot.

Counts toward a grave's quality once it is buried, matched by the grave's wreaths.

Never counts for the graveyard and uses up a wreath; makes a better zombie and opens a zombie perk slot each.

Each white skull matched by a wreath on the grave becomes one point of quality.
How an extraction turns out
An operation at the Autopsy Table I runs for a number of ticks, and each tick succeeds or fails - Anatomy mastery sets how often it succeeds. The result depends on how many ticks succeeded.

Enough successful ticks to reach the organ's gold mark: the organ comes out as an item.

Between the silver and gold marks: the organ is removed from the body, but it is ruined and no item is left.
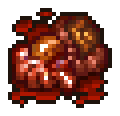
Short of the silver mark: the organ is removed and a Surgeon's Error is left in its place - 1 red and 1 white skull less.
Extracting each organ: the Anatomy mastery it needs, its ticks, and the successful ticks needed to remove it (silver) or keep it (gold), plus the tech points each operation earns.
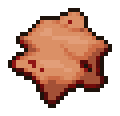 | Skin | Bronze | 1 | 6 | 3 | 5 | 1 red, 1 blue |
| Skin | Silver | 3 | 6 | 3 | 5 | 1 red, 2 blue |
| Skin | Gold | 6 | 6 | 3 | 5 | 1 red, 3 blue |
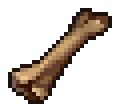 | Bones | Bronze | 2 | 8 | 4 | 7 | 1 red, 1 blue |
| Bones | Silver | 4 | 8 | 4 | 7 | 1 red, 2 blue |
| Bones | Gold | 7 | 8 | 4 | 7 | 1 red, 3 blue |
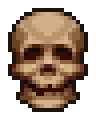 | Skull | Bronze | 3 | 10 | 5 | 9 | 1 red, 1 blue |
| Skull | Silver | 5 | 10 | 5 | 9 | 1 red, 2 blue |
| Skull | Gold | 8 | 10 | 5 | 9 | 1 red, 3 blue |
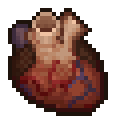 | Heart | Bronze | 5 | 12 | 6 | 11 | 1 red, 1 blue |
| Heart | Silver | 9 | 12 | 6 | 11 | 1 red, 2 blue |
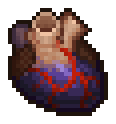 | Heart | Gold | 13 | 12 | 6 | 11 | 1 red, 3 blue |
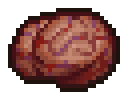 | Brain | Bronze | 8 | 14 | 7 | 13 | 1 red, 1 blue |
| Brain | Silver | 10 | 14 | 7 | 13 | 1 red, 2 blue |
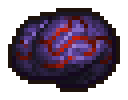 | Brain | Gold | 13 | 14 | 7 | 13 | 1 red, 3 blue |
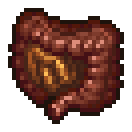 | Guts | Bronze | 9 | 12 | 6 | 11 | 1 red, 1 blue |
| Guts | Silver | 11 | 12 | 6 | 11 | 1 red, 2 blue |
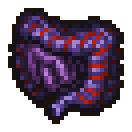 | Guts | Gold | 13 | 12 | 6 | 11 | 1 red, 3 blue |
Embalming
Embalming adds or trades skulls without surgery. Solutions and injections are made at the Formulation Bench and applied at the Embalming Table I; the grade (I to III) comes from how well the solution was made.
Embalming mixes and what they do to a corpse's skulls.
| Mix | Red skulls | White skulls | Made from | Value | |
|---|---|---|---|---|---|
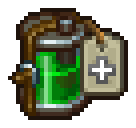 | Solution for Corpses I | 0 | +1 | 1 Melted Fat and 1 Preservative | 1 silver |
| Solution for Corpses II | 0 | +2 | 1 Melted Fat and 1 Preservative | 10 silver |
| Solution for Corpses III | 0 | +3 | 1 Melted Fat and 1 Preservative | 50 silver |
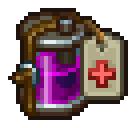 | Solution for Zombies I | +1 | 0 | 1 Alcohol and 1 Preservative | 2 silver |
| Solution for Zombies II | +2 | 0 | 1 Alcohol and 1 Preservative | 12 silver |
| Solution for Zombies III | +3 | 0 | 1 Alcohol and 1 Preservative | 60 silver |
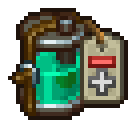 | Injection for Corpses I | -1 | +1 | 1 Melted Fat, 1 Preservative and 1 Comet's Tail | 2 silver |
| Injection for Corpses II | -2 | +2 | 1 Melted Fat, 1 Preservative and 1 Comet's Tail | 12 silver |
| Injection for Corpses III | -3 | +3 | 1 Melted Fat, 1 Preservative and 1 Comet's Tail | 70 silver |
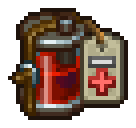 | Injection for Zombies I | +1 | -1 | 1 Alcohol, 1 Preservative and 1 Comet's Tail | 3 silver |
| Injection for Zombies II | +2 | -2 | 1 Alcohol, 1 Preservative and 1 Comet's Tail | 13 silver |
| Injection for Zombies III | +3 | -3 | 1 Alcohol, 1 Preservative and 1 Comet's Tail | 80 silver |
Arriving corpses
How many corpses arrive is set with the Nun: "No corpses", "A few corpses" or "Lots of corpses". The first choice is made in The Nun with the Hairy Ass on any day, later changes only on Wrath, and the choice stays until it is changed. "Lots of corpses" brings them more often and up to 2 at a time, and no corpse arrives while the Morgue is full. The corpses themselves get better three times: twice during Brawns and Brains (when Agatha is asked for better corpses, and when she is handed 2 Furniture Kit I and 2 Building Kit I) and once at the end of The House at the Crossroads. While the God of dead blessing from the Prayer for Repose lasts, every arriving corpse is one row further down the table. Burying a corpse earns the certificate shown.
What arriving corpses carry.
| Arrives | Red skulls | White skulls | Gold organs | Burial reward |
|---|---|---|---|---|
| From the start | 0 to 1 | 2 to 4 | 0% | Burial Certificate I |
| After Agatha is asked for better corpses in Brawns and Brains, or from the start with God of dead | 1 to 5 | 1 to 5 | 4% | Burial Certificate II |
| After the Furniture Kit I and Building Kit I hand-over in Brawns and Brains, or after asking for better corpses with God of dead | 2 to 6 | 2 to 6 | 15% | Burial Certificate III |
| After The House at the Crossroads, or after the kit hand-over in Brawns and Brains with God of dead | 3 to 7 | 3 to 7 | 20% | Burial Certificate III |
| After The House at the Crossroads, with God of dead | 3 to 7 | 3 to 7 | 20% | Burial Certificate III |
Tools for better organs
Autopsy questions
What does removing an organ do to a grave's score?
Removing a red-skull organ lowers the corpse's red skulls, so fewer of the grave's wreaths go to covering red skulls; a clean extraction also leaves the organ as an item. Removing a white-skull organ lowers the most the grave can score.
What causes a Surgeon's Error?
Too few of the operation's ticks succeeded. Below the Anatomy shown in the table above, each tick succeeds with a chance of Anatomy divided by that number; at or above it, every tick succeeds.
Which skulls matter for a zombie?
Red skulls: each one opens a zombie perk slot. Red organs are added at the autopsy table, and Solution or Injection for Zombies at the embalming table changes the skulls without surgery.