Let your AI assistant work on your wiki (MCP)
Updated 2026-10-09
MCP (Model Context Protocol) is how AI assistants connect to other software: Claude, ChatGPT, Codex, Gemini, Copilot and many more. Switch on MCP access for your wiki and your assistant can build pages, fill datasets, restyle the wiki and work through the review queue while you talk to it.
It works on your wiki only, as you, with the limits you set. Every change it makes is in the history with a label, and you can take its access away at any time.
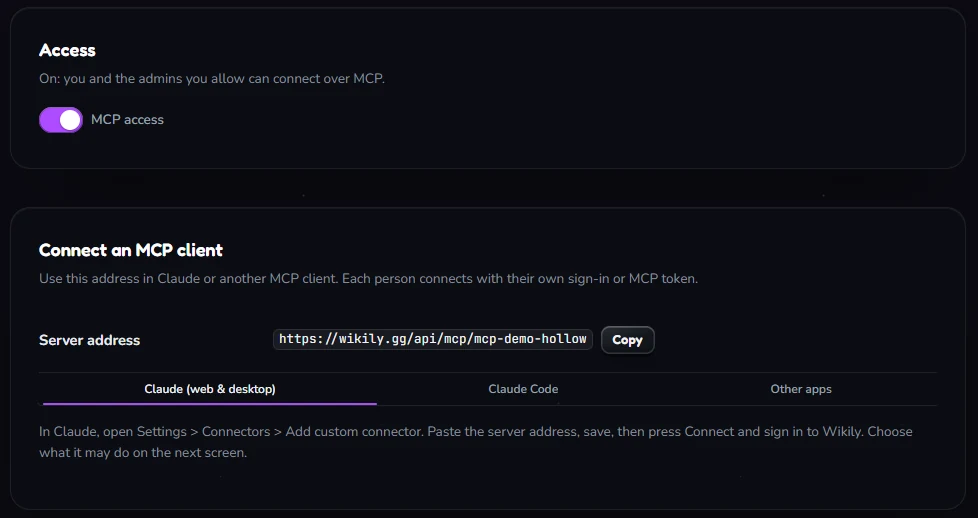
Turn it on
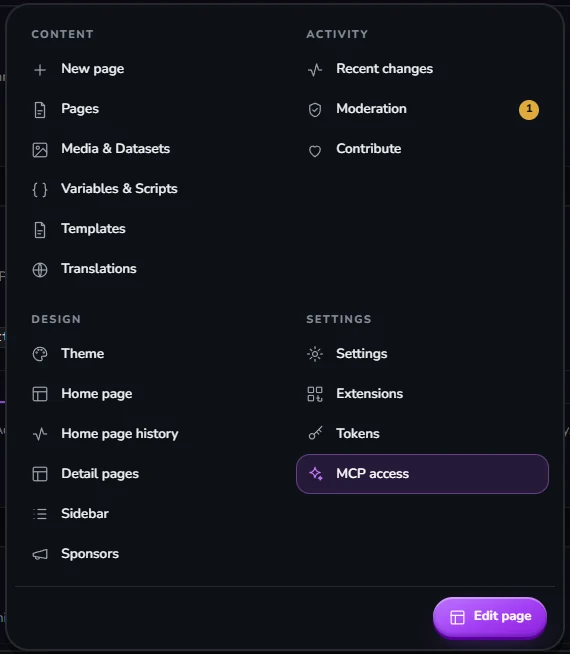
- Open Manage › MCP access (under Settings). Only the wiki's owner can flip the switch.
- Turn on MCP access. It is off on every wiki until its owner turns it on.
- Copy the Server address. Every wiki has its own:
https://wikily.gg/api/mcp/your-wiki.
Connect your AI assistant
Any assistant that speaks MCP over the internet works with your wiki. There are two ways in, and most apps offer both.
Claude and ChatGPT: sign in
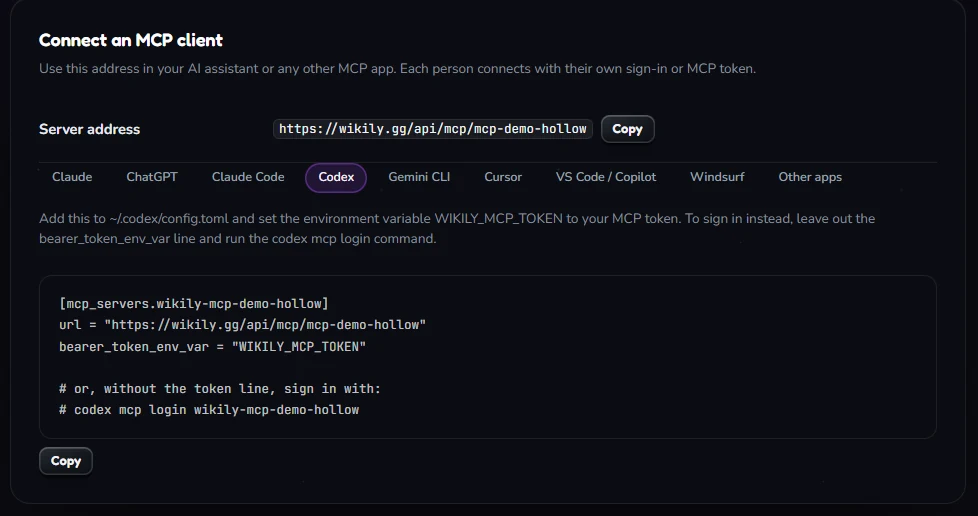
- Add a custom connector or custom MCP server in the app (see the table) and paste the server address. In ChatGPT, choose OAuth as the authentication.
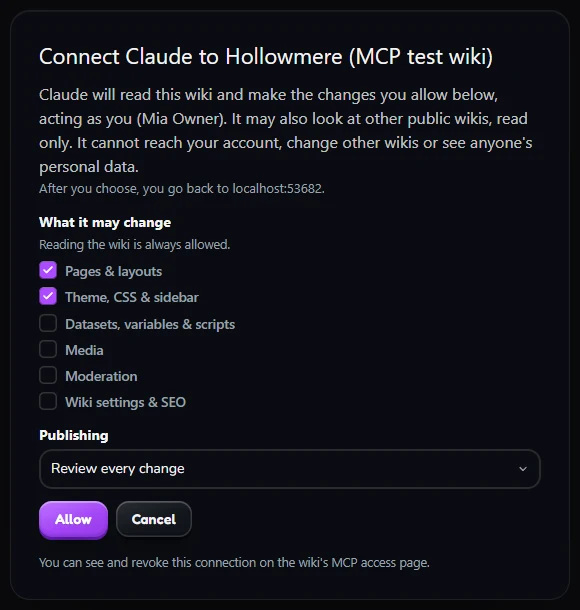
- Press Connect. A Wikily window opens: sign in if you are not, choose what it may change and Publishing, and press Allow.
- In a chat, turn the connector on from the tools menu and ask away.
ChatGPT only signs in; it has no field for a token. It asks you before each change it makes, and your ChatGPT plan decides whether it may change things or only read.
Terminal and editor apps: a token
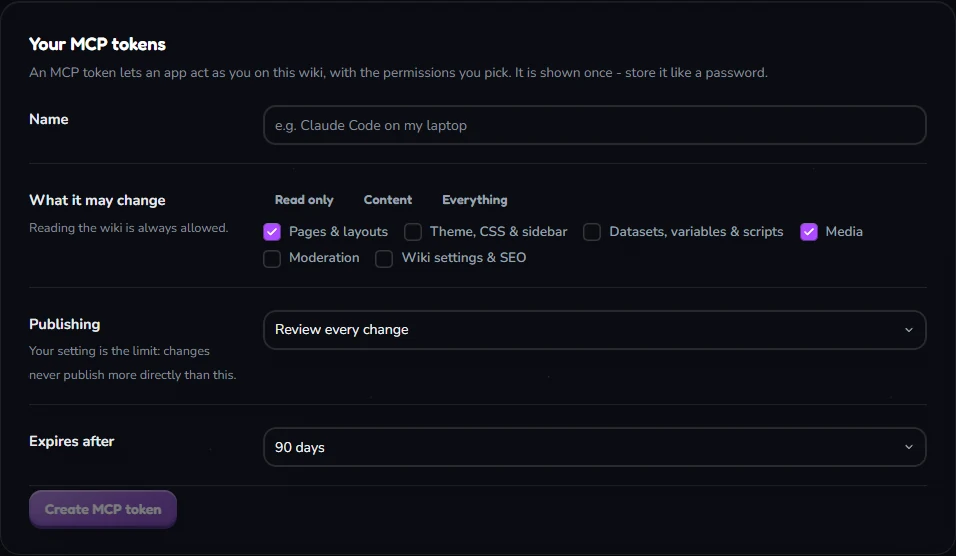
- On the MCP access page, under Your MCP tokens, press New MCP token. Name it after where it will live ("Codex on my laptop").
- Pick What it may change, Publishing and Expires after, then Create MCP token. The token is shown once.
- Put it in your app's setup below. Most apps can also sign in instead.
Claude Code. Run this. To sign in instead, leave out the header and use /mcp in Claude Code.
claude mcp add --transport http wikily-your-wiki https://wikily.gg/api/mcp/your-wiki --header "Authorization: Bearer wkm_your-token"Codex (OpenAI). Add this to ~/.codex/config.toml and set the environment variable WIKILY_MCP_TOKEN to your token.
[mcp_servers.wikily-your-wiki]
url = "https://wikily.gg/api/mcp/your-wiki"
bearer_token_env_var = "WIKILY_MCP_TOKEN"

# or, without the token line, sign in with:
# codex mcp login wikily-your-wiki
Gemini CLI. Add this to ~/.gemini/settings.json. Without headers, sign in with /mcp auth.
{
  "mcpServers": {
    "wikily-your-wiki": {
      "httpUrl": "https://wikily.gg/api/mcp/your-wiki",
      "headers": {
        "Authorization": "Bearer wkm_your-token"
      }
    }
  }
}
Cursor. Add this to ~/.cursor/mcp.json and set WIKILY_MCP_TOKEN. Without headers, Cursor offers to sign in.
{
  "mcpServers": {
    "wikily-your-wiki": {
      "url": "https://wikily.gg/api/mcp/your-wiki",
      "headers": {
        "Authorization": "Bearer ${env:WIKILY_MCP_TOKEN}"
      }
    }
  }
}
VS Code / GitHub Copilot. Add this to .vscode/mcp.json for Copilot's agent mode; VS Code asks for the token once. Without headers and inputs, it signs in.
{
  "inputs": [
    {
      "type": "promptString",
      "id": "wikily-token",
      "description": "Wikily MCP token",
      "password": true
    }
  ],
  "servers": {
    "wikily-your-wiki": {
      "type": "http",
      "url": "https://wikily.gg/api/mcp/your-wiki",
      "headers": {
        "Authorization": "Bearer ${input:wikily-token}"
      }
    }
  }
}
Windsurf. Open the MCP config file (Cascade › … › Open MCP config file), add this and set WIKILY_MCP_TOKEN.
{
  "mcpServers": {
    "wikily-your-wiki": {
      "serverUrl": "https://wikily.gg/api/mcp/your-wiki",
      "headers": {
        "Authorization": "Bearer ${env:WIKILY_MCP_TOKEN}"
      }
    }
  }
}
Any other app, and testing. Anything that supports remote MCP servers (Streamable HTTP) works the same way. To check the connection, the MCP Inspector lists what your token may use:
npx @modelcontextprotocol/inspector --cli https://wikily.gg/api/mcp/your-wiki --transport http --header "Authorization: Bearer wkm_your-token" --method tools/listEvery app gets the same tools and the same limits. What it may do is decided by your token or sign-in on Wikily, never by which app you use.
Choose how changes land
Every token and every app sign-in has a Publishing setting. It is a hard limit: whatever the AI asks for, its changes never go live more directly than this. Queued changes are accepted or rejected like any other edit (reviewing edits).
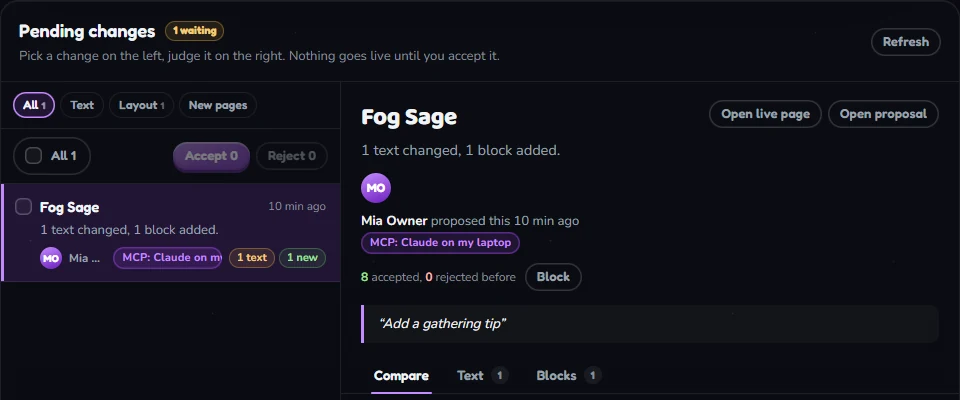
Start with Review every change. Once you trust how it works on your wiki, move to AI decides.
Let your admins use it
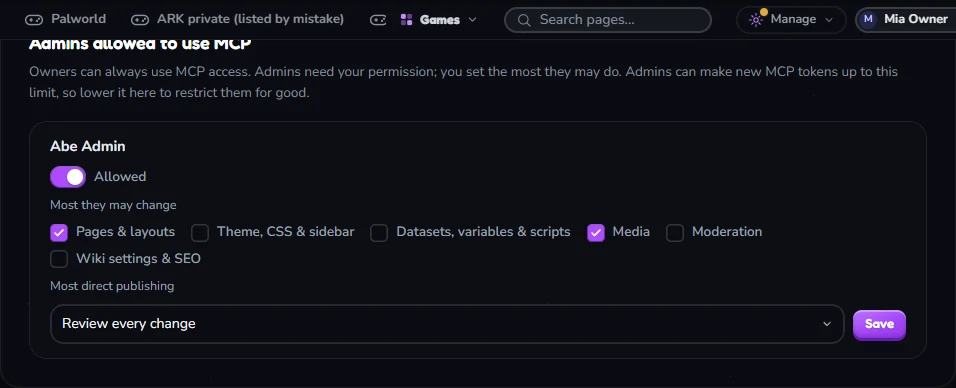
Admins cannot use MCP until you allow them, each person on their own. Under Admins allowed to use MCP, tick Allowed and set the most they may change and the most direct publishing. Their own tokens can never go above that. Taking someone's admin role away also ends their MCP access.
What it can and cannot do
Copy a look from another wiki
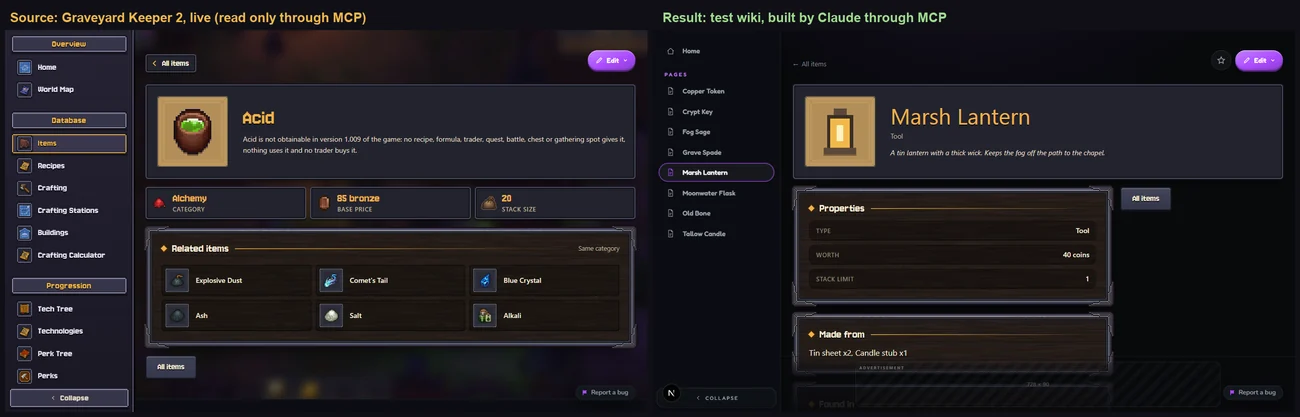
Your assistant can open any public wiki on Wikily read-only and rebuild its look in your wiki, with your data and your images. Ask it the way you would ask a person:
Build a detail page for my items that looks like the item pages on the Graveyard Keeper 2 wiki.
It reads that wiki's item layout, matches its fields to your dataset's fields, builds the shared layout in your wiki and creates the item pages. Their images and text stay theirs: it copies the structure and the style, not the content.
Things to ask
Keep it cheap on a $20 plan
For scale: the Graveyard Keeper 2 example above took Claude Sonnet about a minute and 40 tool calls, all eight item pages included.
Revoke, activity and history
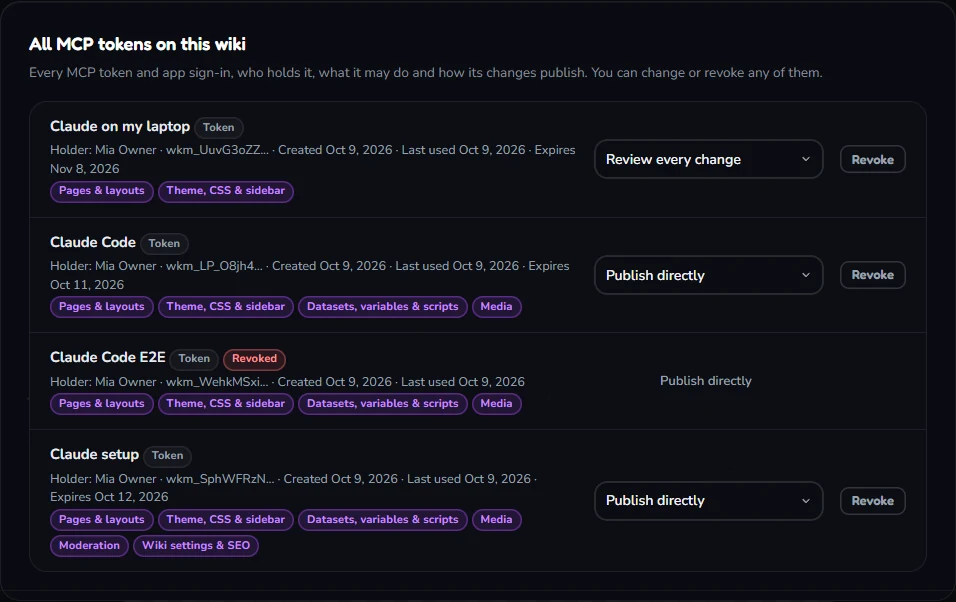
- Revoke a token or an app sign-in on the MCP access page: it stops working at once. You see every token on your wiki with its holder, when it was created and last used, what it may change and when it expires.
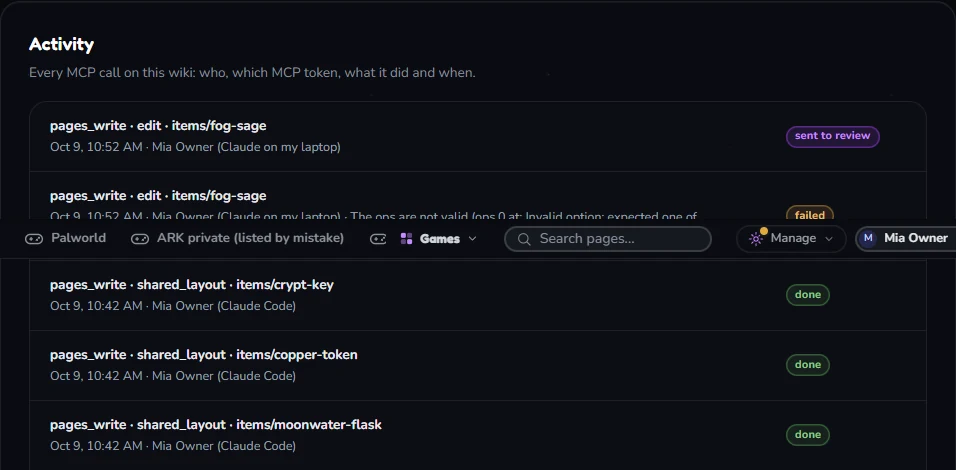
- Activity lists every MCP call on your wiki: who, which token, what it did and when.
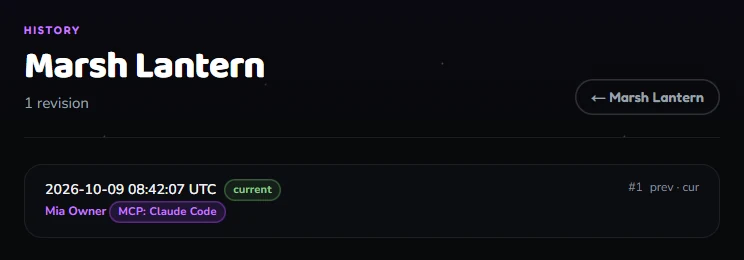
- In a page's history, changes made through MCP carry a badge with the token's name. Restore any earlier version from there.