Shastasaurus
Water · 9 maps
Overview
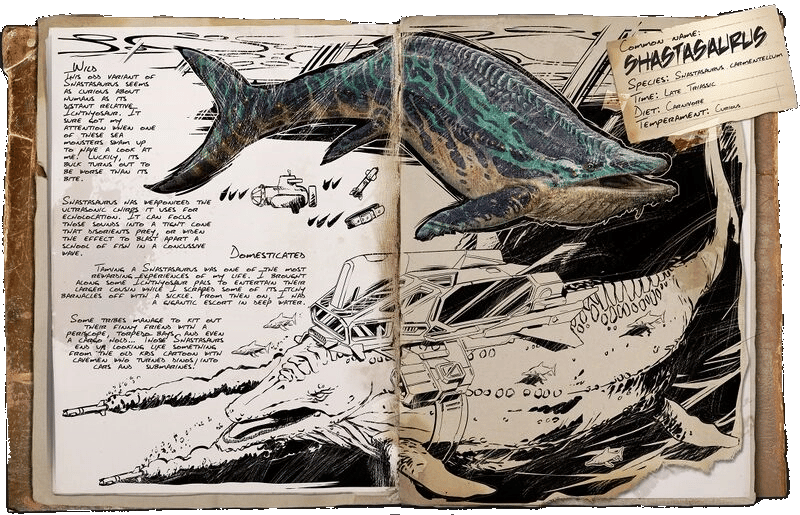
The Shastasaurus is a large aquatic carnivore that inhabits the open ocean. It possesses a unique passive taming mechanic involving leech removal and baiting with tamed Ichthyosaurus. Once tamed, it excels as a mobile underwater transport and combat mount. It can be airlifted by Quetzal or Karkinos for fast deployment.
This creature is frequently used for deep-sea exploration and hunting due to its agility and combat abilities in water.
Spawn Locations
9 mapsShastasaurus spawns in ocean biomes across 9 ARK maps. It is very commonly encountered, making it relatively easy to locate. Focus your search in open water zones, where spawn density is highest.
Each shape is a real spawn volume. Click for exact chance and zone info.
Taming
Taming a Shastasaurus requires the Special Passive method. Lure it to the surface using 1-3 tamed Ichthyosaurus as bait. Dive beneath it and use a Sickle to remove three leeches from its belly. Feed it Extraordinary Kibble or Raw Prime Fish Meat at its mouth. Repeat the cycle until taming completes. More Ichthyosaurus nearby extend the time it stays surfaced. Taming takes about 20 minutes. Use the calculator below for your settings.
To tame a Shastasaurus, lure it to the ocean surface using 1-3 tamed Ichthyosaurus as bait. Once surfaced, dive underneath and use a Sickle to scrape three leeches off its belly. After clearing the leeches, feed it Extraordinary Kibble (or Raw Prime Fish Meat) at its mouth. Repeat the leech-removal and feeding cycle until taming completes. More Ichthyosaurus nearby extends the time it stays surfaced.
Drops & Harvest Resources
Killing a Shastasaurus yields Hide and Raw Prime Meat. The Hatchet yields the most Hide, while the best tool for Raw Prime Meat is not specified.
| Resource | ||
|---|---|---|
| 40%~82~63 hits | 60%~123~50 hits | |
| 4%~4~63 hits | 4%~4~50 hits |
Estimates based on game-extracted data (weights, quantities, harvest multipliers, damage type chains). Each harvest event independently rolls each resource - higher weight = higher drop chance. Actual yields vary with RNG.
Damage Resistances
Shastasaurus takes +400% damage from Spike Wall attacks, making it extremely vulnerable to defensive perimeters. It also takes +120% from Instant HurtDinos and +55% from Melee DmgMetal RaidDino. It is 100% resistant to Mining Drill Harvest damage. Focus on Health and Melee Damage for combat effectiveness.
Kill XP
Wild Kill (1.25×)15 base × 15.9 level × 4 × 1.25× wild kill × 1× server
Server Settings(Game.ini)
Official servers use non-1× defaults; the values above already reflect official rates.
Saddle Crafting XP
Base × 1× quality × 4 × 1× server
| Stat | Base (Lv.1) | Wild +/Lv | Tamed +/Lv |
|---|---|---|---|
| 4500.0 | +540.00 | +3.50% | |
| 300.0 | +30.00 | +2.00% | |
| 3000.0 | +180.00 | +0.00% | |
| 8000.0 | +800.00 | +2.00% | |
| 3000.0 | +60.00 | +0.80% | |
| 100.0% | +5.00% | +10.00% | |
| 100.0% | +0.00% | +0.50% |
Hitbox Multipliers
The head of the Shastasaurus has a damage multiplier of 1.5x, making headshots more effective for knocking it out. All other body zones have standard damage resistance.
Can Damage
Can break Thatch and Wood. Build at least in Stone.
| Attack | Base | Thatch | Wood | Stone | Metal | Tek |
|---|---|---|---|---|---|---|
| BiteCarnivore Large | 75 | 412.5 | 225.0 | — | — | — |
Numbers reflect base melee at level 1, 100% TE, no imprint. The damage calculator lets you scale by melee %, server multipliers, and pick a specific structure for exact hit counts.
Tools & Guides
Shastasaurus Tips & Tricks
The Shastasaurus has a passive ability that triggers when ridden, providing a constant buff to the rider.
Its Bite attack deals 75 damage with a 1-second cooldown.
The TailSwipe attack hits for 90 damage with a 5-second cooldown and a range of 65 meters.
It is highly vulnerable to Spike Walls, taking 400% increased damage, so avoid placing it near such defenses.
It gains 100% resistance to Mining Drill Harvest damage, making it immune to drill-based harvesting structures.
This page details the Shastasaurus's taming, breeding, harvesting, and combat statistics. For precise calculations, refer to the taming calculator, breeding timer, and spawn map located below.